Milestones
Testomat.io introduces Milestones to support structured test management across your development cycles.
In software development, a milestone represents a significant checkpoint or phase in a project (e.g., release, sprint, or major delivery). It is used to group work, track progress, and evaluate results within a defined scope and timeline.
With Milestones in Testomat.io, you can:
- Create milestones to define testing scope for a specific phase.
- Assign tests and test runs to a milestone.
- Execute tests within the context of a milestone.
- Generate reports based on milestone results.
This enables end-to-end test management aligned with project phases, providing clear visibility into progress and outcomes for each milestone.
How to Create a Milestone
Section titled “How to Create a Milestone”Milestone lives at the company-level but can be scoped down to specific projects. It’s a tracking mechanism (like a Sprint, Release, or Version) that can be linked to various items in the system (Tests, Suites, Plans, Runs, Rungroups, Requirements). Milestones help organize and track work across related items with state management, automatic propagation, and project scoping.
To create Milestone:
- Navigate to ‘Milestones’ tab from the main workspace dashboard.
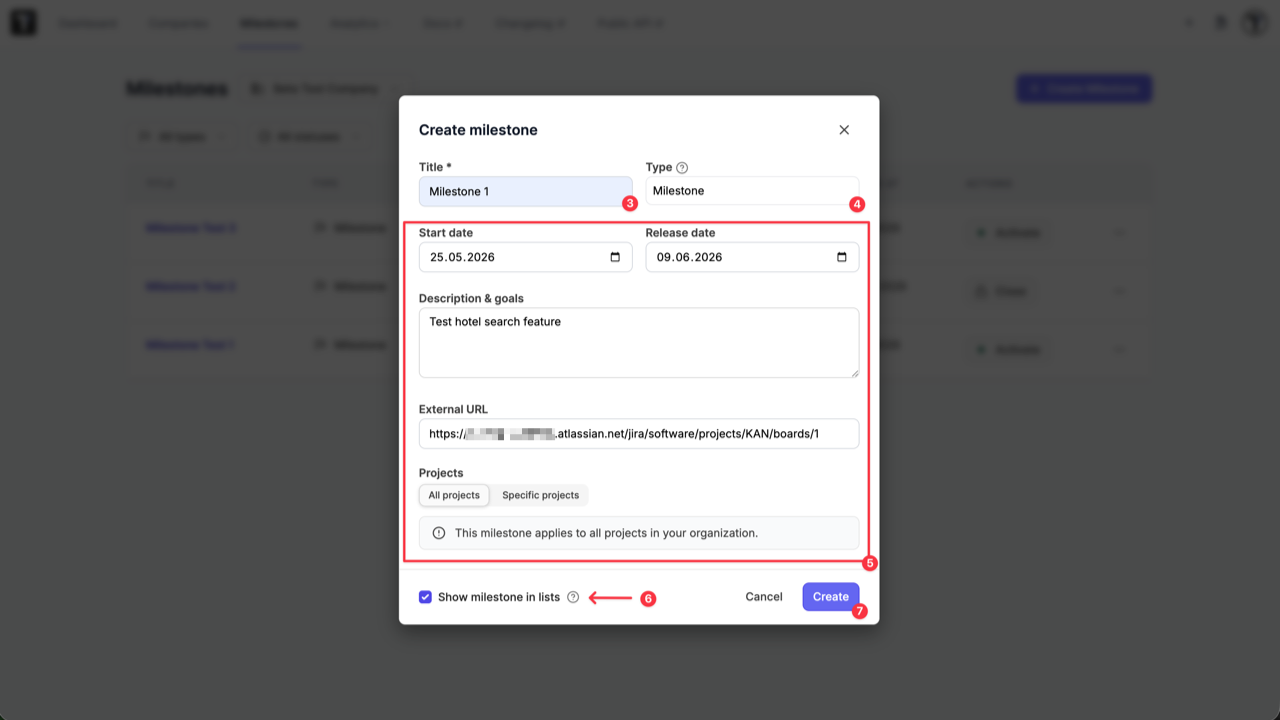
- Click ‘Create Milestone’ button.
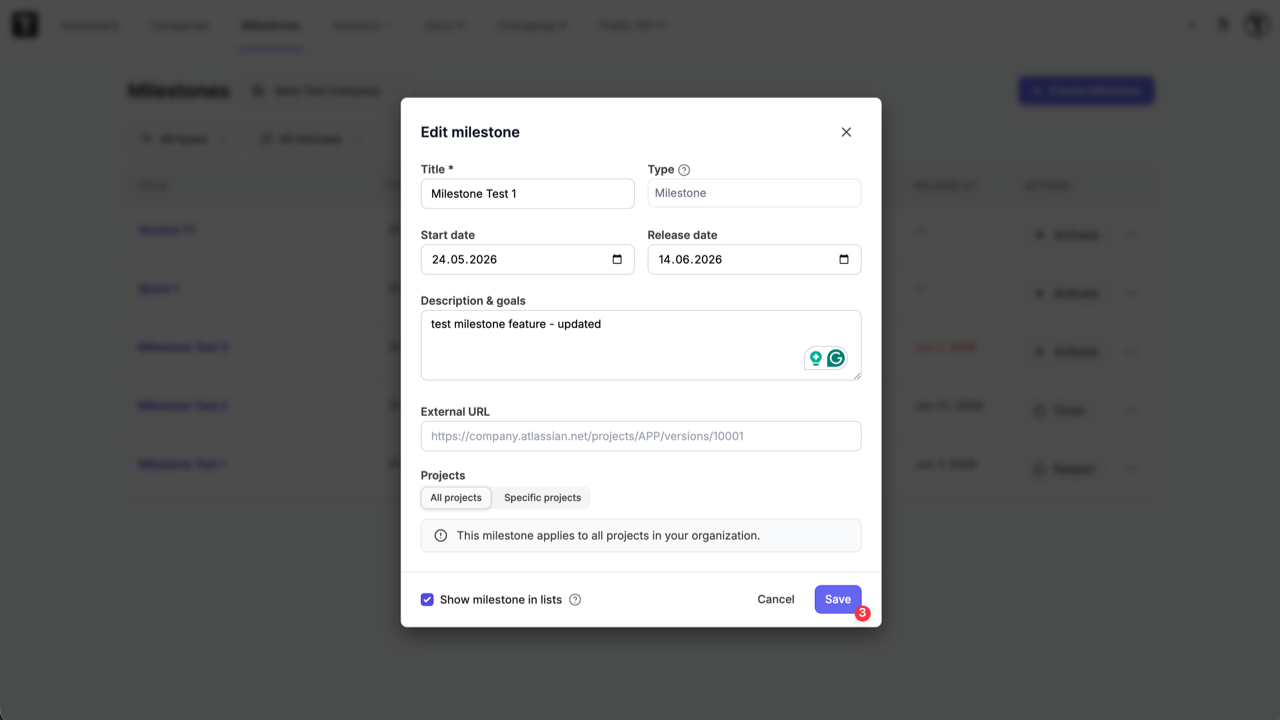
- Title: Enter a name for your milestone (Required).
- Type: Enter a name of category (e.g., Sprint, Release, Iteration, Phase). Milestones are grouped by type. You can create multiple types. If left blank, the system defaults to the ‘Milestone’ type.
- Fill in optional fields as needed:
- Start date & Release date: Your start date must occur before or on the release date.
- Description & goals: Detail what this milestone aims to achieve.
- External URL: Link directly to your matching sprint in Jira, GitHub, or internal tracking documentation.
- Projects: Select the specific projects that can access this milestone. By default, it is shared with all projects within the company.
- Show milestone in lists: (Enabled by default). When enabled, this milestone appears in the tests, suites, runs, and plans lists. Turn this off to hide deprecated, archived, or legacy milestones from daily dropdown selection menus while safely preserving historical links attached to old test runs or plans.
- Click ‘Create’ button.
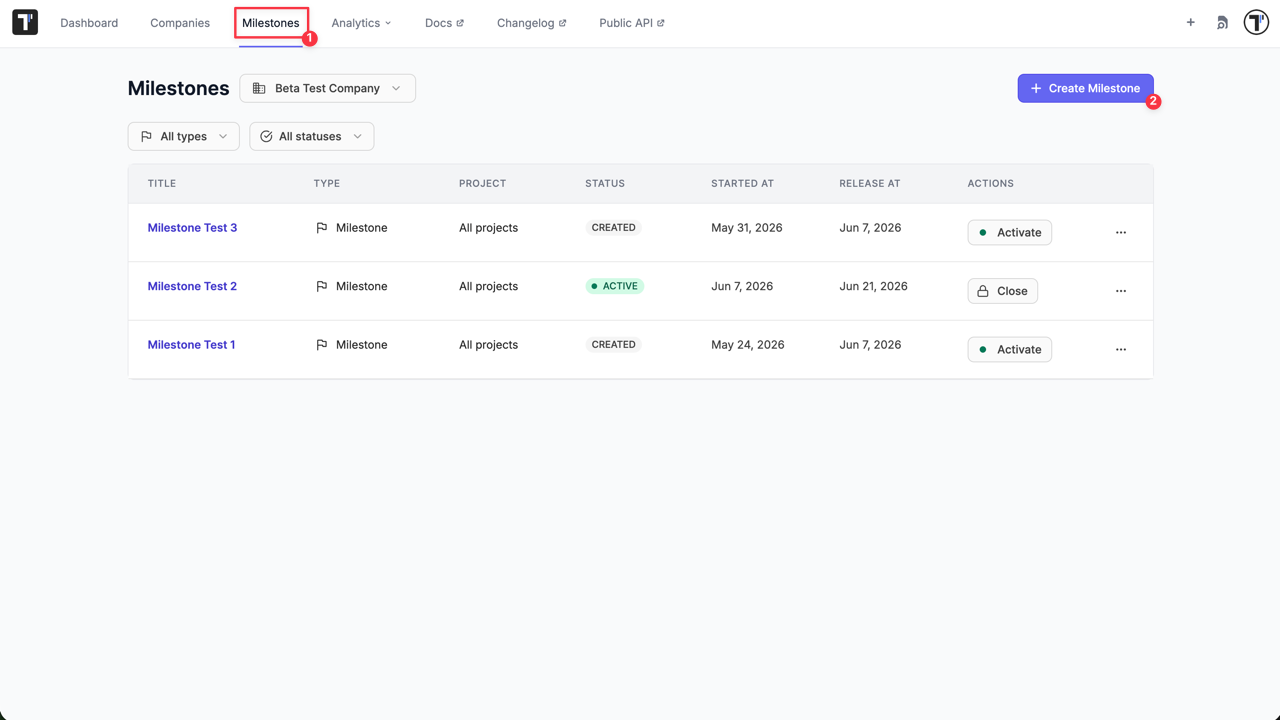
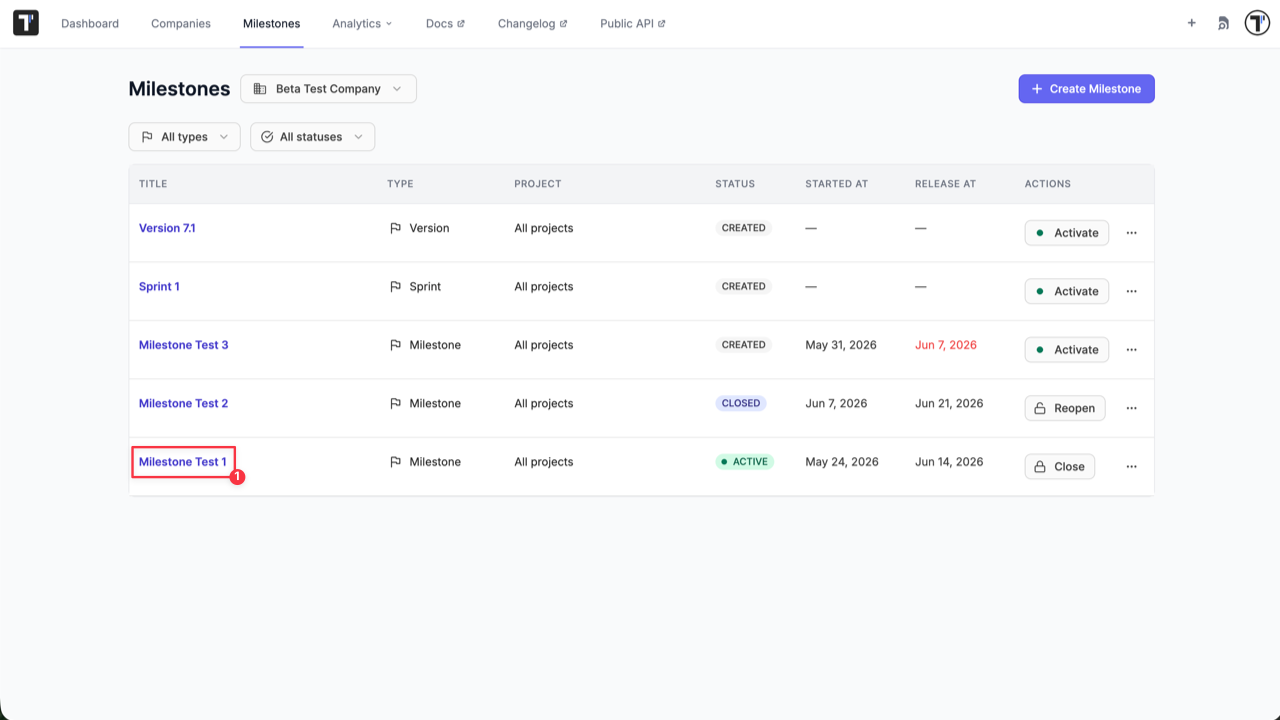
After milestone is created, it automatically appears in the list on ‘Milestones’ page and can be assigned to test, suites, plans and runs. Milestone can be activated at any time.
How to Edit & Delete Milestone
Section titled “How to Edit & Delete Milestone”You can modify or remove milestones at any point using two different ways: from main ‘Milestones’ page and from the ‘Milestone details’ page.
Edit a milestone from the main ‘Milestones’ page:
- Click on three dot to open the extra menu for selected milestone.
- Click ‘Edit’ button.
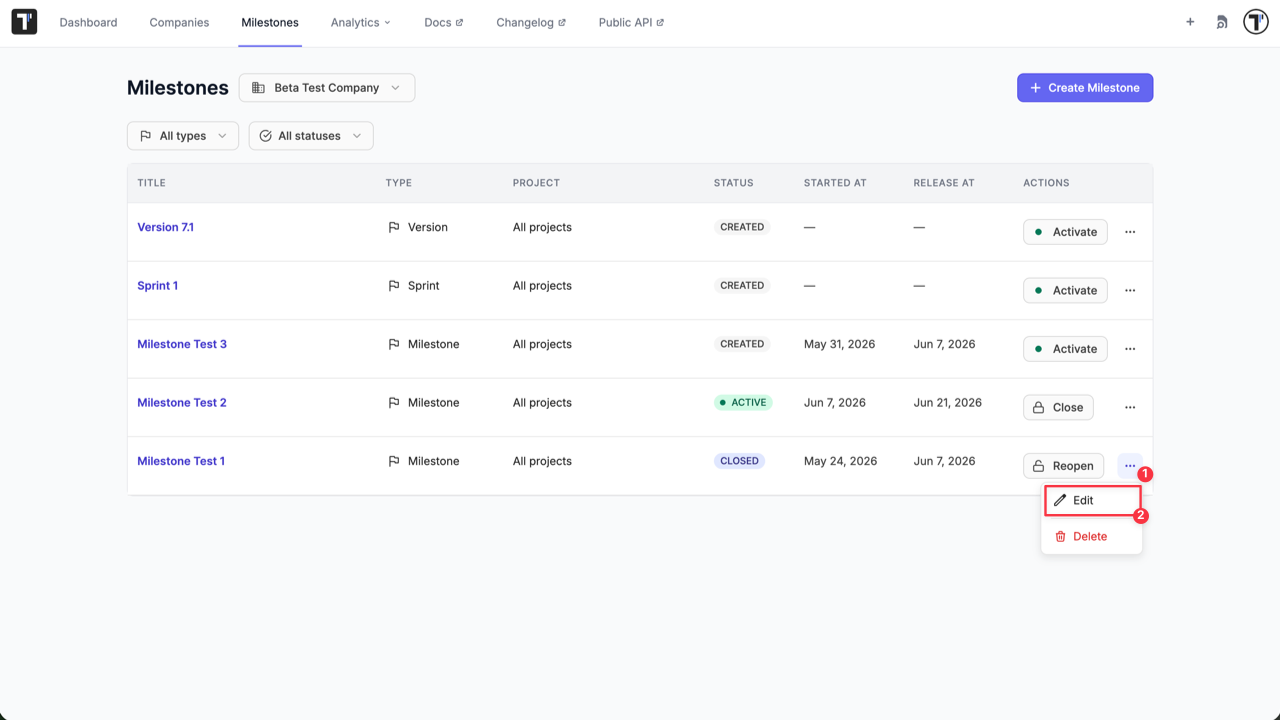
- Apply your updates in the ‘Edit Milestone’ modal and click ‘Save’.
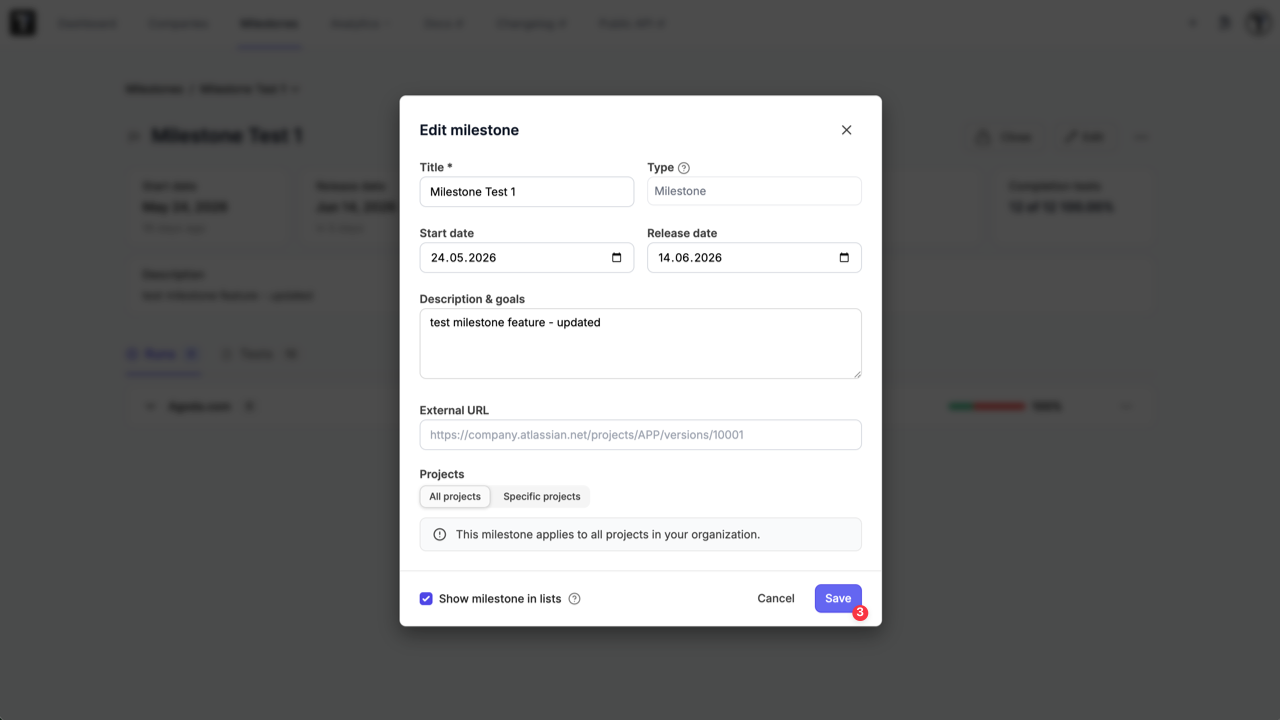
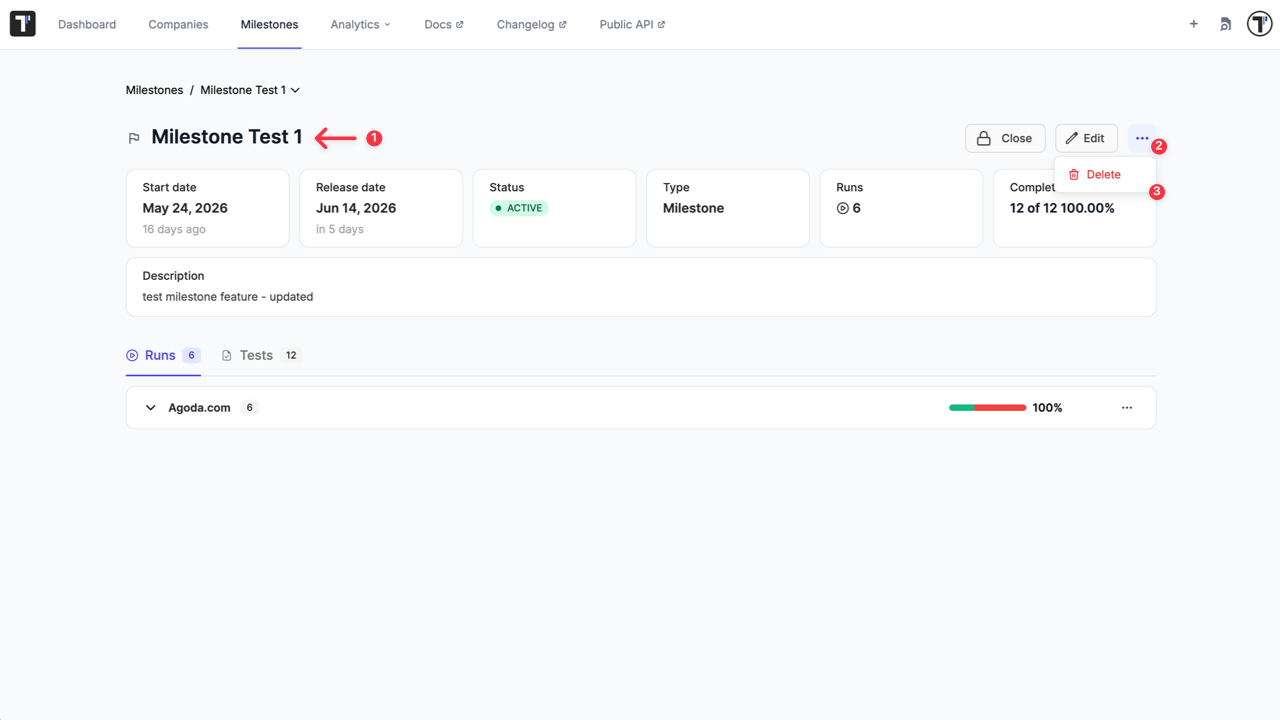
Edit a milestone from the ‘Milestone details’ page:
- Click on milestone name.
- Click ‘Edit’ button.
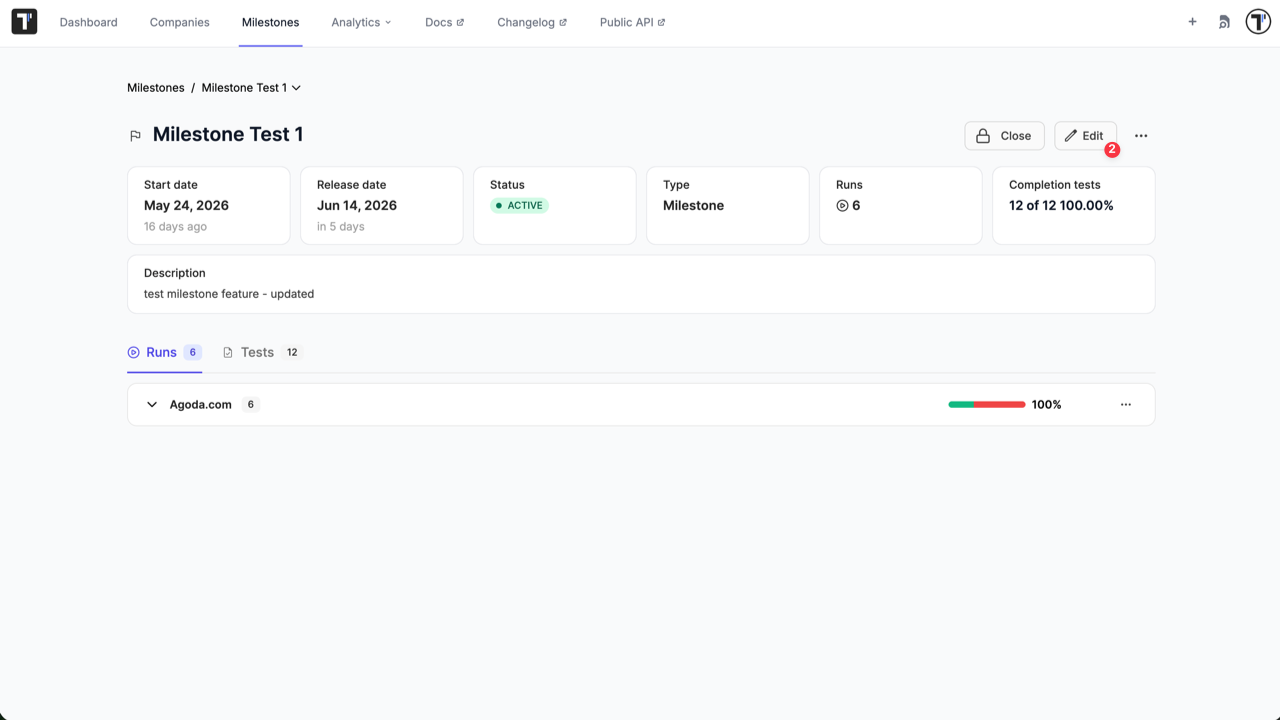
- Apply your updates in the ‘Edit Milestone’ modal and click ‘Save’.
Delete a milestone from the main ‘Milestones’ page:
- Click on three dot to open the extra menu for selected milestone.
- Click ‘Delete’ button.
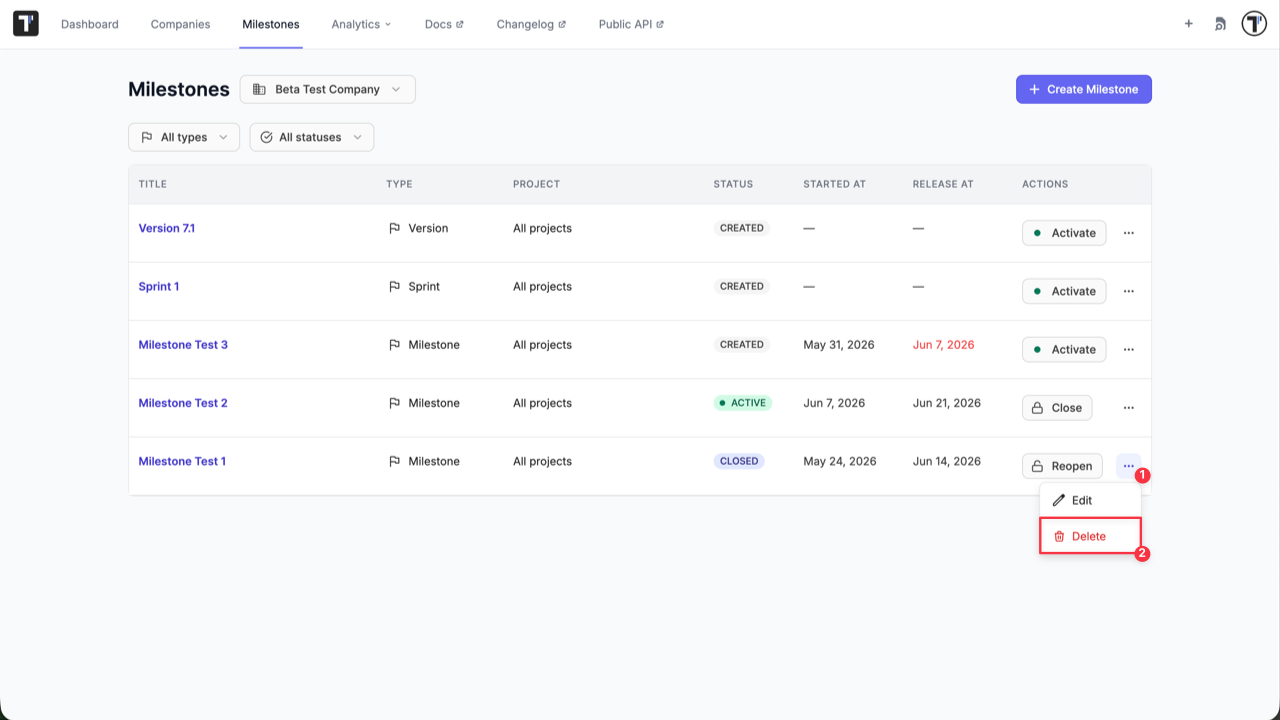
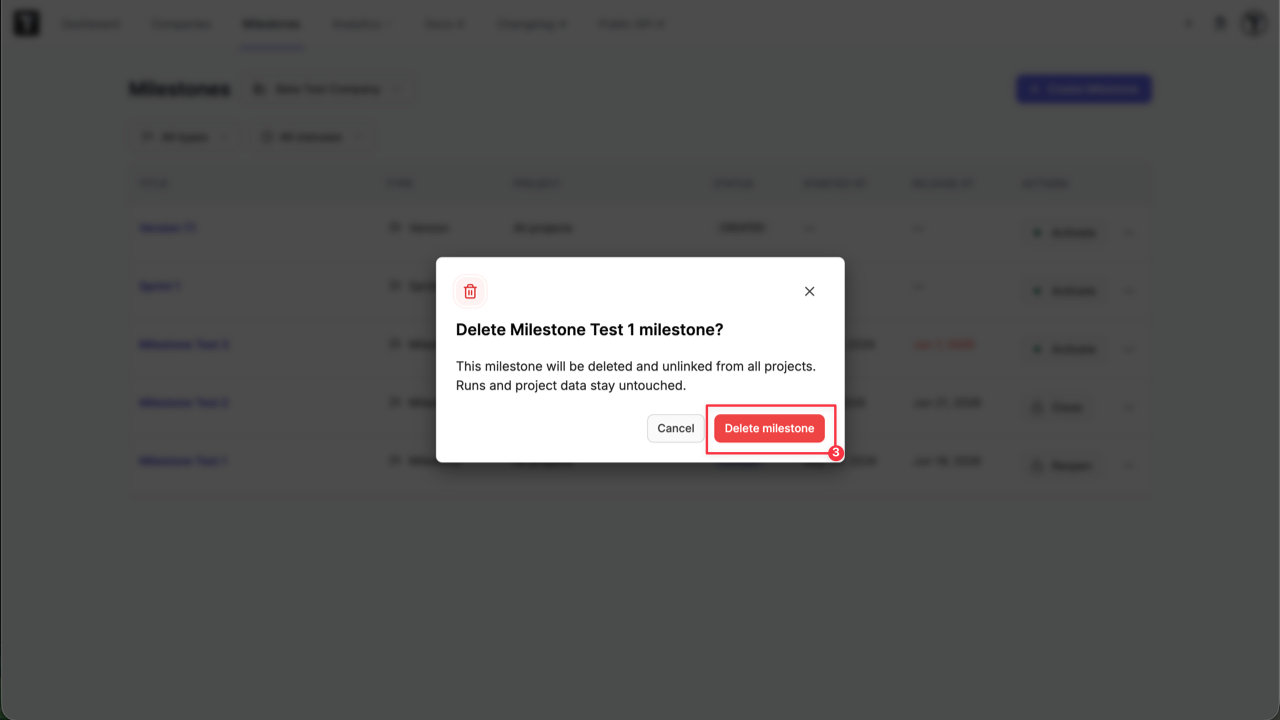
- Click ‘Delete milestone’ button to confirm your action.
Milestone as well can be deleted from the ‘Milestone details’ page:
How To Activate a Milestone
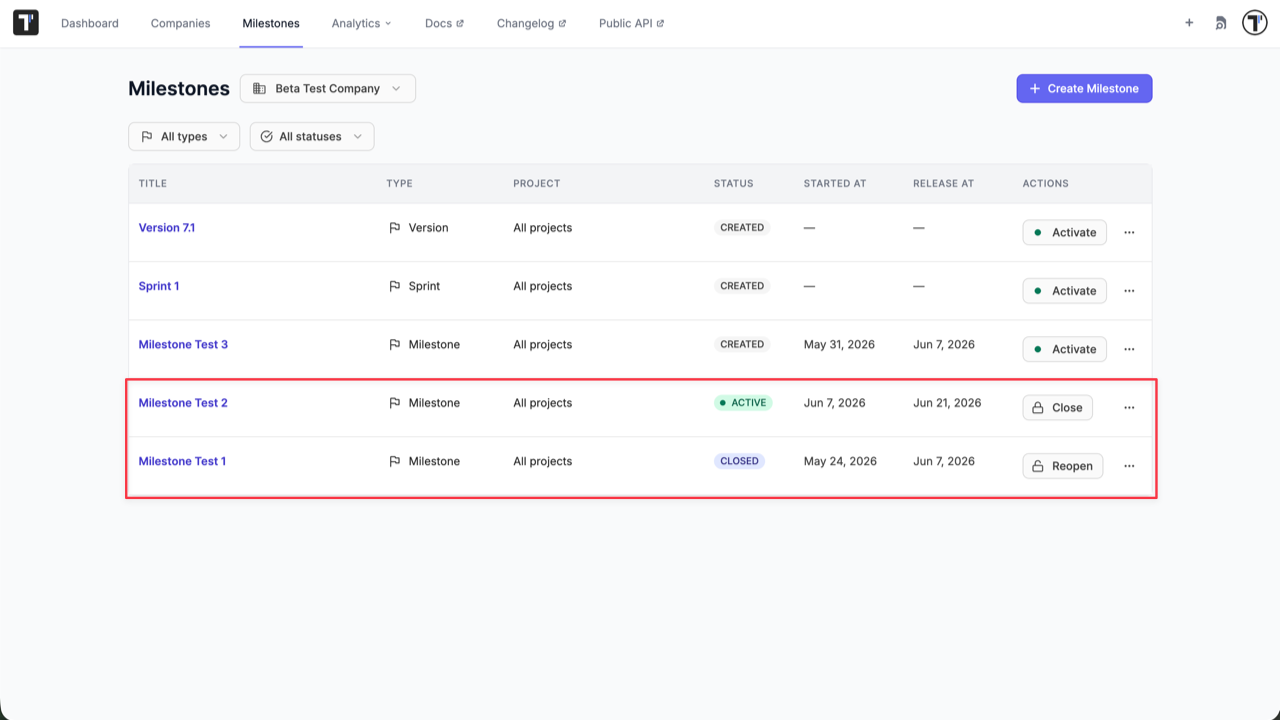
Section titled “How To Activate a Milestone”To avoid confusion about what your team is currently working on, only one milestone of the same type can be active at a time.
To activate milestone:
- Click ‘Activate’ button.
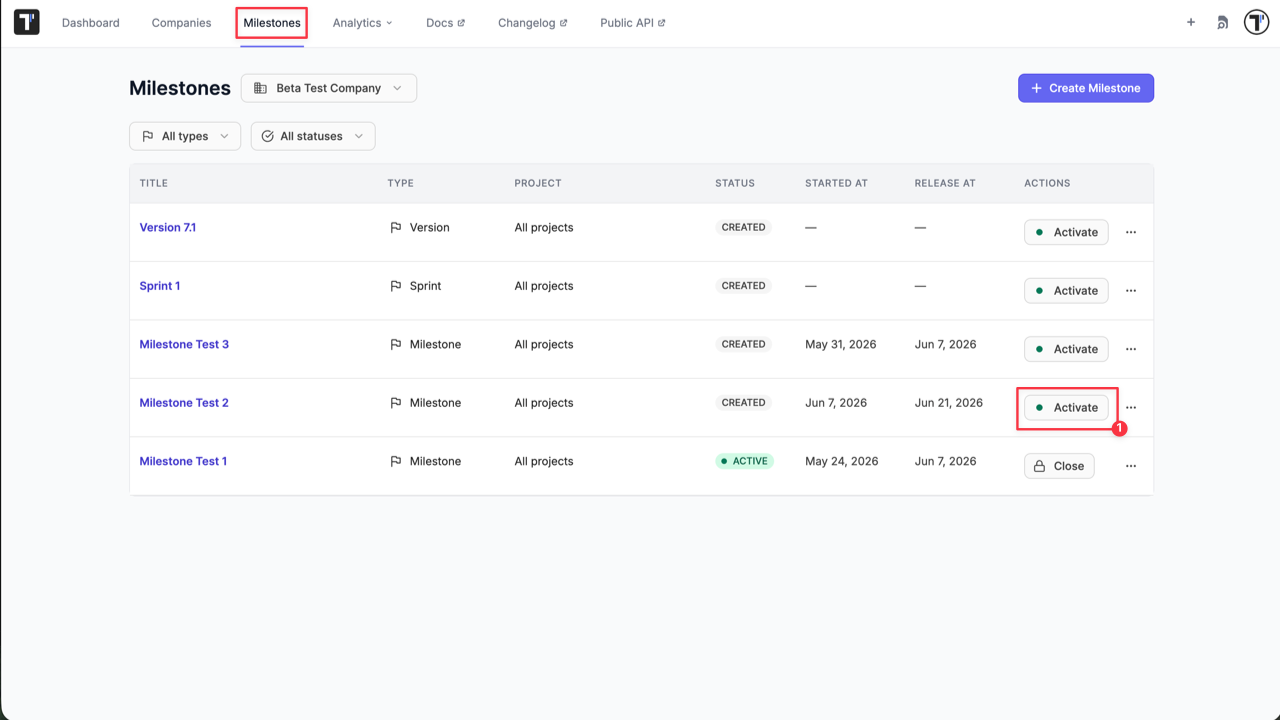
- Confirm action on ‘Activate Milestone’ modal.
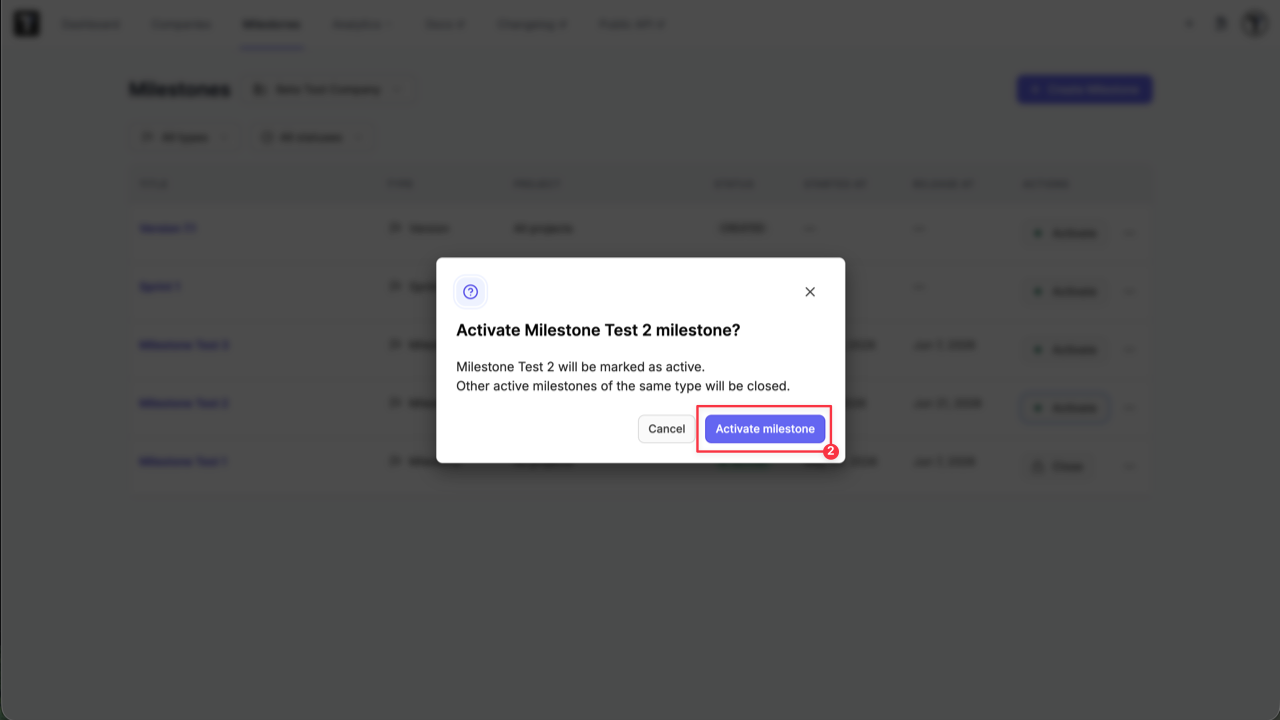
When you activate a milestone, Testomat.io automatically shifts any previously active milestone of that same type into a Closed state and timestamps the exact moment of closure (closed_at).
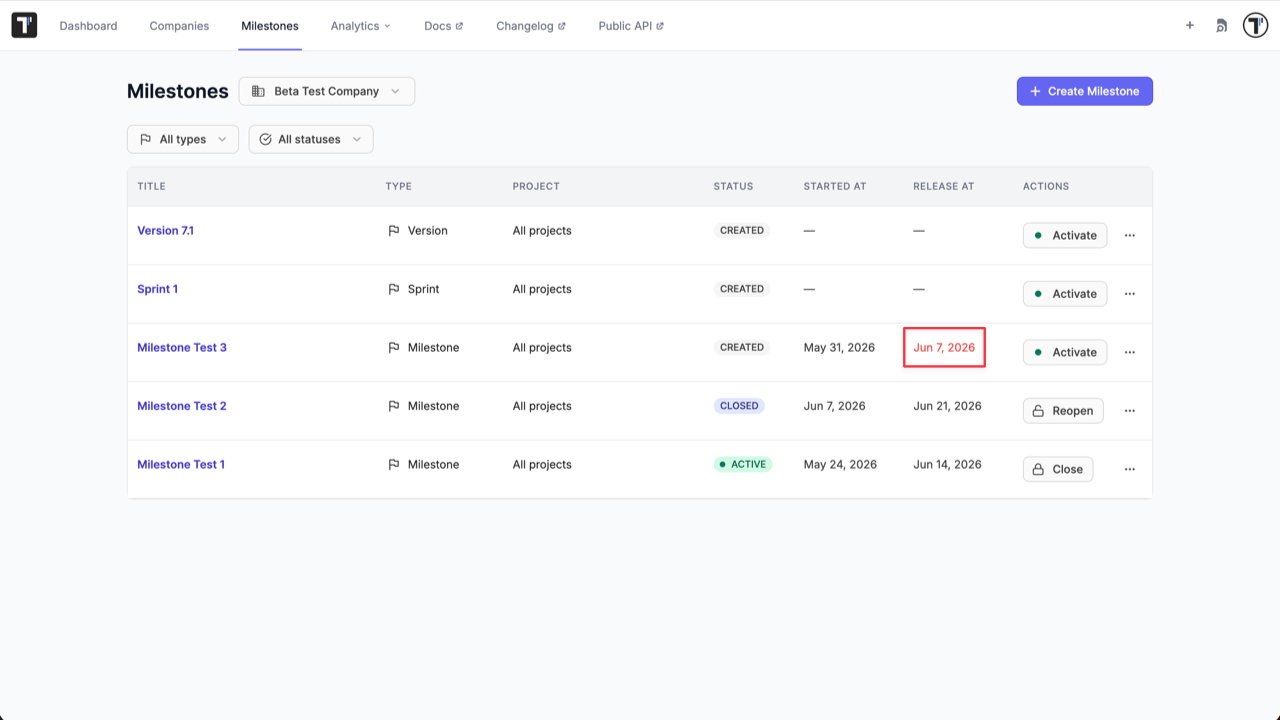
Expired Milestone Warnings
Section titled “Expired Milestone Warnings”If a milestone reaches its target Release Date but has not been manually marked as Closed, the system keeps it open but automatically flags it as Expired.
This automatic status change provides a clear visual indicator on your team dashboards, helping you instantly spot slipping deadlines, overdue deliverables, or uncompleted tasks that require immediate attention.
How to Assign Milestones
Section titled “How to Assign Milestones”You can associate milestones with six distinct structural components: Test, Suite, Plan, Run, Rungroup, Requirement.
Core Rules of Milestone Linking:
- Smart Link Switching
An item can only belong to one milestone per type at a time. If a test case is currently linked to Sprint 1 and you assign it to Sprint 2, the system automatically replaces it. Don’t worry — milestones of other types (for ex. Release v1.0) will stay perfectly intact.
- Automatic Downward Sharing (Cascading)
You don’t need to manually assign a milestone to hundreds of individual test cases. When you link a milestone to a parent container, the system automatically shares it downwards to all nested elements in the background:
-
Suites: Assigning a milestone to a Suite cascades it to all tests inside that suite.
-
RunGroups: Assigning a milestone to a RunGroup cascades it to all test runs inside that group automatically.
Steps to Assign a Milestone:
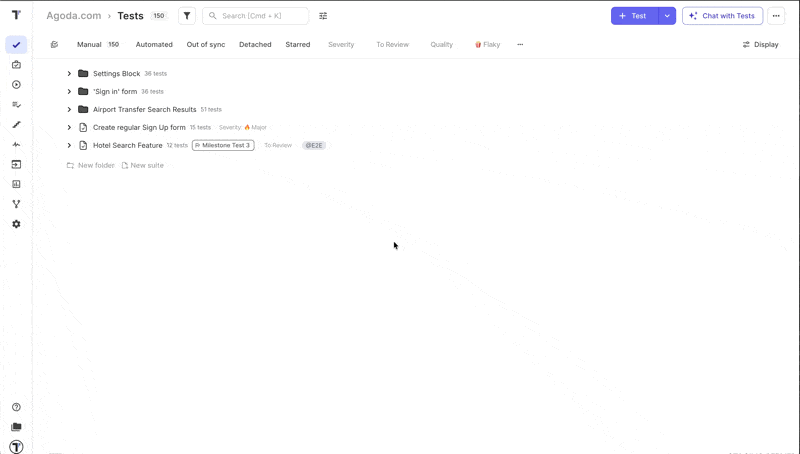
- Go to ‘Tests’ page.
- Select the Suite or individual item you want to map.
- Click the ‘Set milestone’ label in the details panel.
- Select one or more milestones across your available types.
- Click ‘Save’ button.
Same logic applies to any other entity a milestone can be assigned to.
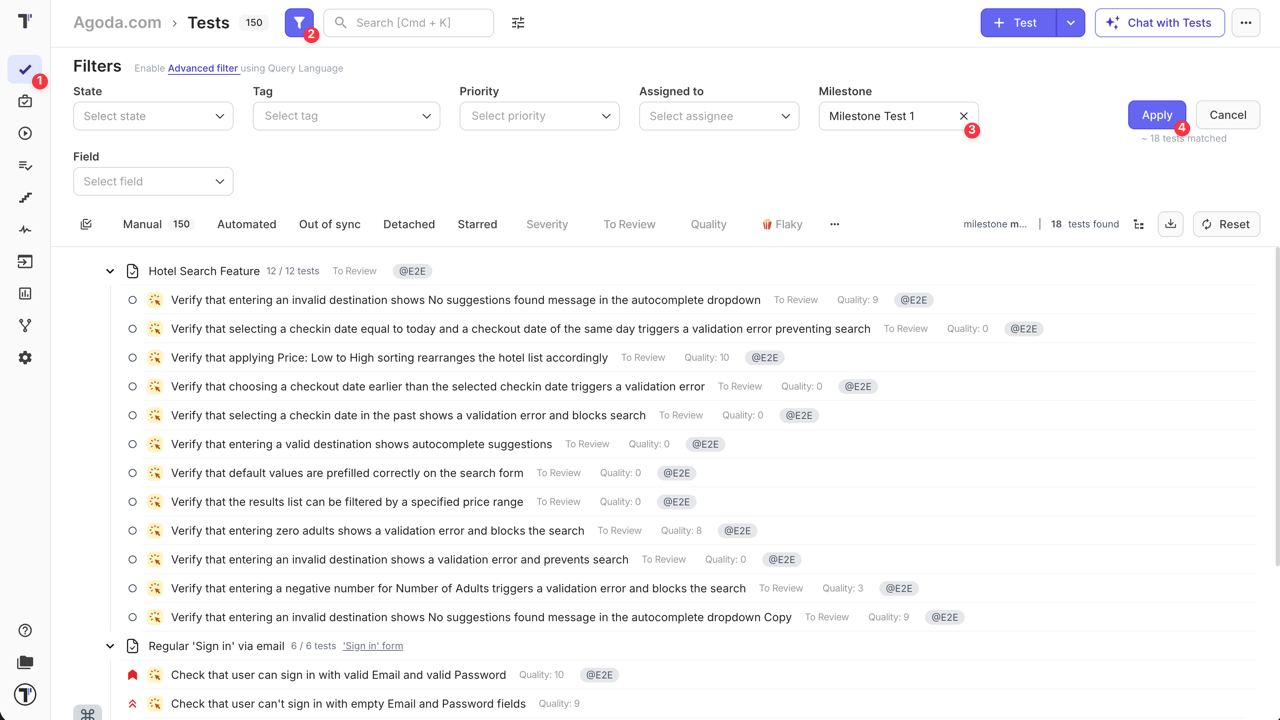
Filter by Milestone
Section titled “Filter by Milestone”Testomat.io allows you to filter your tests, suites, runs, and plans by Milestone using either the regular interface filter or the advanced Testomatio Query Language (TQL) filter.
Using the Interface Filter
Section titled “Using the Interface Filter”- Open the Tests, Runs, or Plans tab.
- Click on the Filter dropdown at the top of the list.
- Select your Milestone Type (e.g., Sprint or Release) and choose the specific milestone from the list.
- Click ‘Apply’ button to apply selected filter.
The workspace will dynamically update to show only the items linked to that milestone.
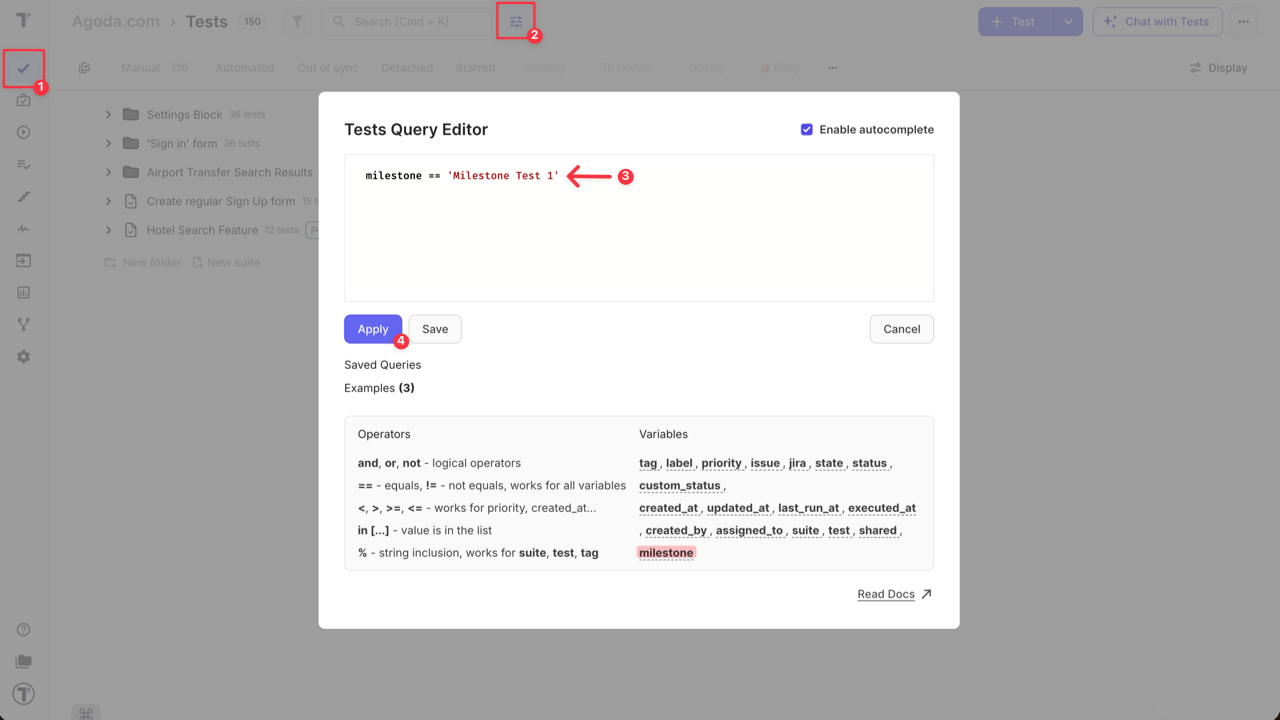
Using Advanced TQL Filters
Section titled “Using Advanced TQL Filters”For more complex queries or when building custom dashboards, you can use the TQL console to filter by milestone properties.
- Open the Tests, Runs, or Plans tab.
- Click ‘Query Language Editor’ icon at the header of the page.
- Enter filter query.
- Click ‘Apply’ button.
Milestone Analytics & Progress Reports
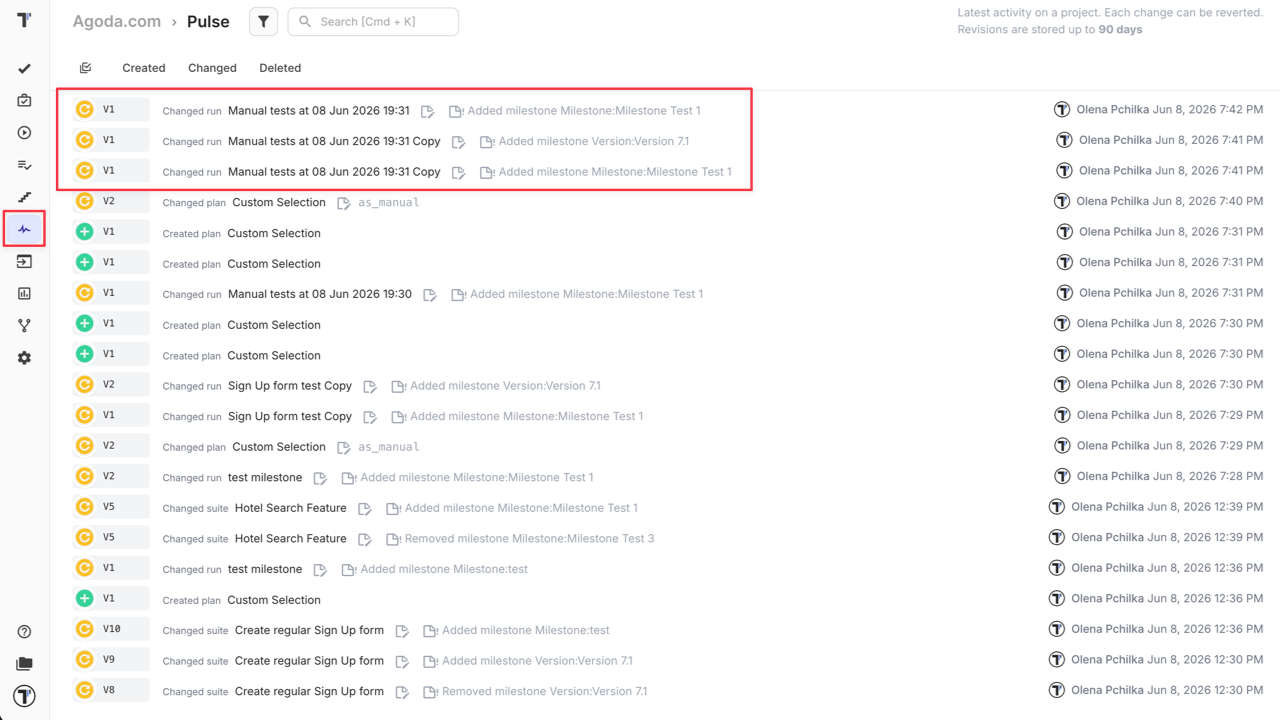
Section titled “Milestone Analytics & Progress Reports”Version Tracking & Audit Logs
Section titled “Version Tracking & Audit Logs”Every time a milestone is linked or unlinked from an item, Testomat.io records an audit trail. This version record documents exactly who made the change, when it occurred, and which artifact was modified, making history tracking seamless.
You can review this real-time history stream on the ‘Pulse’ page.
Milestone Dashboards
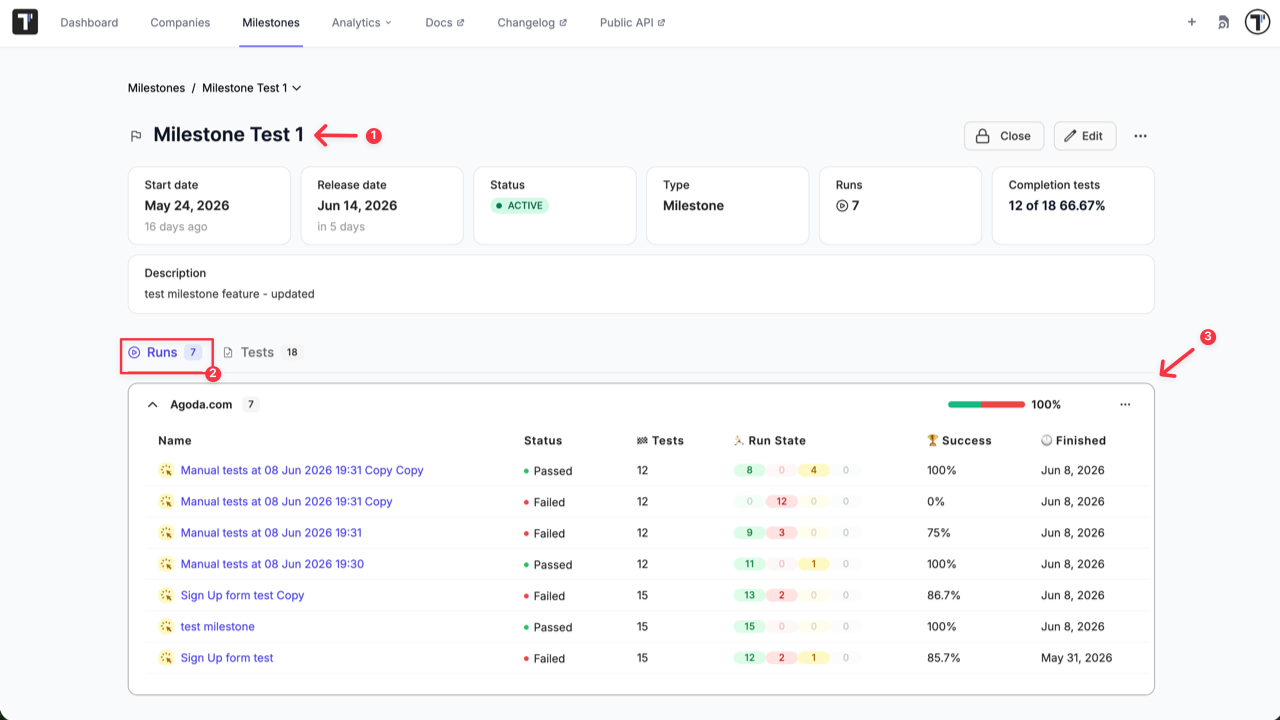
Section titled “Milestone Dashboards”Clicking on any milestone name opens three dedicated reporting views designed to measure your development and testing velocity:
- Milestone Tests: Displays an automated breakdown of test outcomes, detailing total execution history, pass/fail rates, and overall success percentages for the specific milestone scope.
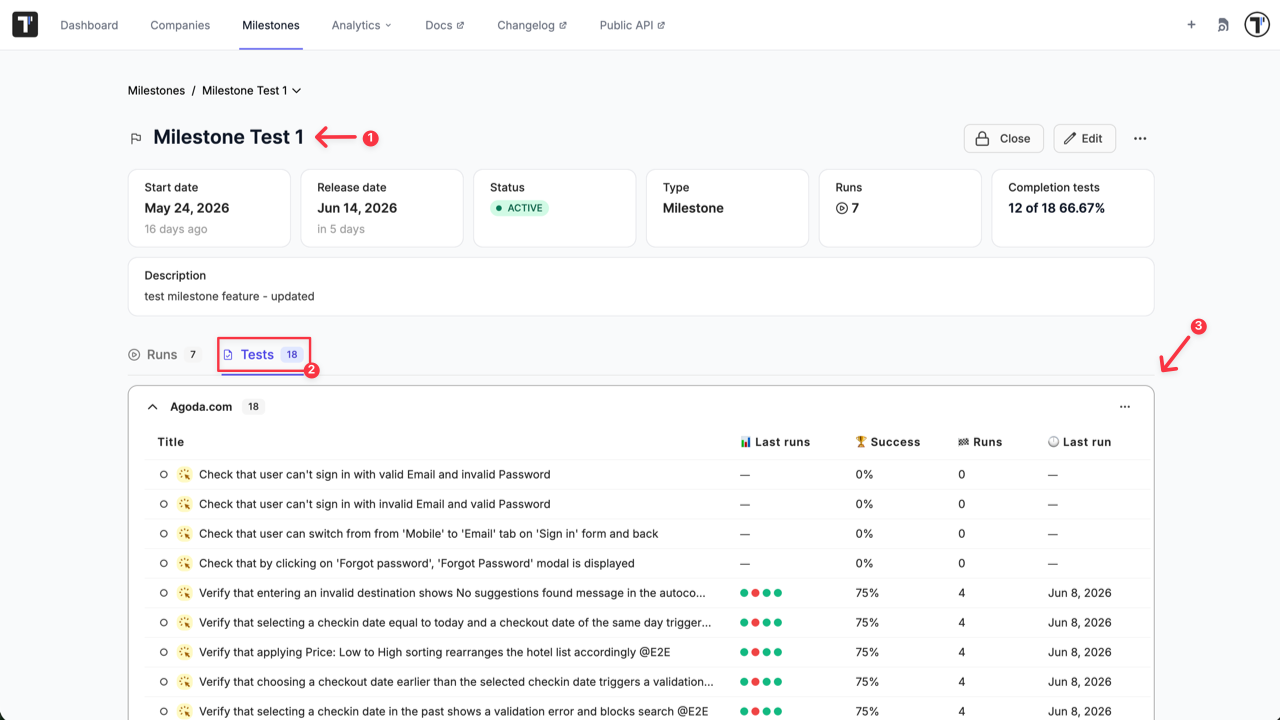
- Milestone Completion: Evaluates overall readiness by tracking total assigned items against fully executed and partially executed tasks to calculate an overall milestone completion percentage.

- Milestone Run Stats: Provides deeper technical execution insights, detailing your automation vs. manual testing ratios, current defect/bug counts, and a helpful list of slow-running tests impacting pipeline speed.